
Frugal Living on the Watkins Ranch Canning Milk
Use the canning funnel and a ladle to fill the jars with milk. Make sure to leave about 1/2'' headspace. Clean the rim of the jars with a clean paper towel, center the lids, and close the jars with the bands, fingertight. Place all of your jars on the rack in the pressure canner.

Canning Milk Important Update YouTube
Start with thoroughly cleaned jars. Next, heat the jars in the canner as directed with the appropriate amount of water. Pour the milk into the jars, leaving about 1/2 inch of space at the top. Wipe the rim of each jar with a clean, damp cloth to remove any residue. Do not use vinegar to wipe the rims.

My Milk Canning Experiment YouTube
Prepare lids and bands according to the instructions from the manufacturer. Once the milk has warmed and the jars have cooled pour the milk into the jars.You do not want to pour cold milk into hot jars as it will cause the jars to break. Fill the jar to one inch of headspace, then wipe the rim with a clean, dry towel.

Canning Milk in Five Easy Steps Our Little Bit of Earth
Discover the step-by-step guide on how to safely and efficiently can milk at home. Learn the art of preserving milk for long-term storage and enjoy the convenience of having this essential ingredient readily available in your pantry. Explore our expert tips and methods for successful milk canning in

Canning Milk Frugal Living on the Ranch
Step 4: Heat the canning lids to a simmer…this softens up the seal and gets the lid ready to can. Muy importante! Step 5: Pour the milk into clean, rinsed jars. Yes, this milk was cold, so that's why I didn't want to have hot jars. Cold milk going into hot jars can lead to cracks in the glass due to thermal expansion.

3 Ways to Preserve Eggs and Milk for Longterm Storage Survival Mom
Get pressure canner ready with maybe 2-1/2" of water in it. Bring to barely steamy warm, we don't want to break cold jars of milk. Bring all jars out of the oven and place on the counter. Let them cool down for 5 minutes. Add 2% milk to jars. Fill to leave 1/2" of headspace. Add lids and rings.
Canning
Step One. Fill your pressure canner up with cold water and put it on the stove. DO NOT TURN IT ON. When canning milk you want everything to be cold. Step Two. Fill your clean jars up with cold milk leaving a 1in headspace. Wipe your rims (do not use vinegar) and place a clean lid and ring on the jar. Put the jar in the canner, and repeat until.
Pressure Canning Milk 15 Min Processing Time For Rich Flavor Two
Did you know that you can can milk at home? And I bet that you won't believe how easy it is. There are a few important steps to follow, but all in all, canni.

Canning Milk Frugal Living on the Ranch
Instructions. • Put water in the pressure canner to a depth of 2-1/2″ and place on the stove burner. • Fill clean jars with fresh milk, leave 1/2″ head space, make sure you don't spill any milk on the rim of the jar and if you do, be sure to wipe it off. • Place a lid on the jar, screw on the ring, and put into the canner.
Canning Milk YouTube
Baking: Canned milk, especially evaporated milk, is commonly used in baking recipes. It can be added to cakes, cookies, pies, and even bread to enhance the texture and flavor. The creamy consistency of canned milk also works well in custards and puddings. Sauces and Soups: Canned milk can be used as a base for creamy sauces and soups. It adds a.
How To Can Milk For Storage Without Refrigeration
Pressure Canning Milk is a contested topic but one that our ancestors didn't bat an eye at. Your kitchen, your rules. My kitchen, let's can milk. I am also s.

Canning Milk Frugal Living on the Ranch
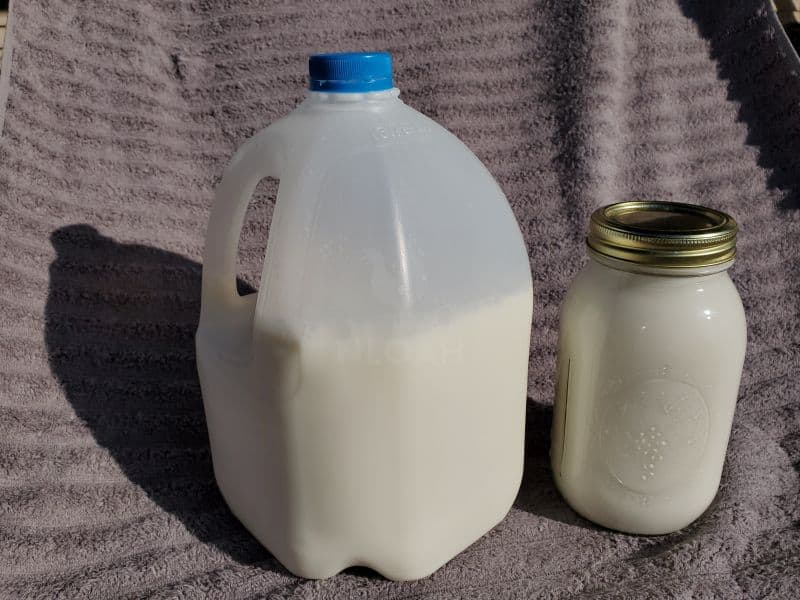
Water. Pressure cooker. Funnel. Ladle. Kitchen towel. tb1234. Before canning, take the milk out of the fridge and let it sit on the counter to warm up a bit. Wash the canning jars with dish soap and water, place them on a baking sheet, and heat them in the oven at 320°F for 15 minutes to sterilize them.

Canning Milk Frugal Living on the Ranch
Canning milk at home is not currently recommended by the USDA or National Center for Food Preservation. The main reason for this is that when milk is properly processed at home, the resulting product is mostly unpalatable (10 to 15 pounds pressure for 15 to 20 minutes).

Many many people can milk. As long at it is pressure canned (PC), and
Preparation: Sterilize the jars and lids as noted in the pressure canning method above. Filling the jars: Fill the jars with milk, leaving 1 inch of headspace at the top. Sealing the jars: Wipe the rims, place the lids, and screw the bands as mentioned in the pressure canning method.
Great Value Evaporated Milk, 12 Fl Oz
Canning milk is a process that allows you to preserve milk for a longer period of time. It is a great way to store milk and have it readily available for use in cooking, baking, or just as a tasty beverage. If done correctly, canned milk can last for up to a year or even longer. Here's a step-by-step guide on how to can milk at home.
5 Easy Ways to Can Milk
What Is Canning Milk? Canning milk is the process of preserving milk by heat-processing it in airtight containers to extend its shelf life and ensure its safety for consumption. Canning milk is a process that involves heating it to a specific temperature to kill harmful microorganisms, then sealing it in sterilized jars or cans.